Scheduling emails in Gmail is a handy feature that lets you plan when your emails are sent.
Let's say you’re using a computer, iPhone, or an Android phone through the Gmail mobile app, you can easily schedule emails to be sent at the perfect time.
In this guide, we will show you how to schedule emails in Gmail, why it’s useful, and how you can edit or cancel scheduled emails if needed.
Why Schedule an Email in Gmail?
Google lets you schedule up to 100 emails at once. But why would you want to schedule an email? Here are four simple reasons:
Avoid sending emails at odd hours. If you write an email late at night, you can schedule it to be sent at a more suitable time the next day.
Different time zones. If the person you're emailing is in a different time zone, you can schedule recurring emails to reach them during their working hours.
Perfect timing. You might want your email to arrive at a specific time, like right before a meeting or on someone's birthday.
Better email open rates. Scheduling emails can help ensure your message arrives when the recipient is most likely to read it, increasing the chances that they'll open and respond to your email.
How to Schedule an Email in Gmail
Google allows you to schedule emails from your desktop, your iPhone through the Gmail app, or your Android phone if you are an Android user. And it only takes a few seconds.
On Desktop
The desktop version of Gmail offers many powerful features, including email scheduling. Here’s how to do it:
1. Sign in to your Gmail account.
2. Click "Compose” on top to create a new email.
3. Write your message as you normally would.
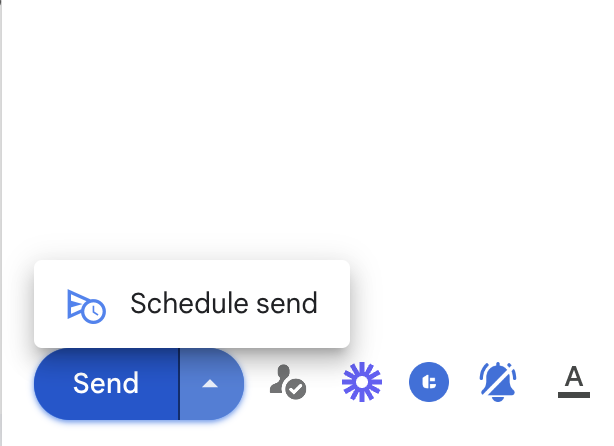
4. Once you finish writing your email, the subject line, and adding the recipient, click on the down arrow next to the “Send” icon as illustrated below.
5. Click “Schedule send” from the dropdown menu.

6. Choose when your email will be sent. You can pick from Gmail’s default options like “Tomorrow morning” or select “Pick date and time” for a custom time.

7. Confirm by clicking on “Schedule send”.
That's it! Your email will be sent at your scheduled time based on the timezone you set.
On Android
Now for all Android users, you can easily schedule emails using the Gmail app if you have a Samsung or any other Android phone or tablet. Follow these steps:
Step 1. The first step is similar to in any device, to open the Gmail app on your phone.
Step 2. The next step is to click on the “Compose” at the bottom right to create a new email.
Step 3. Write your email.
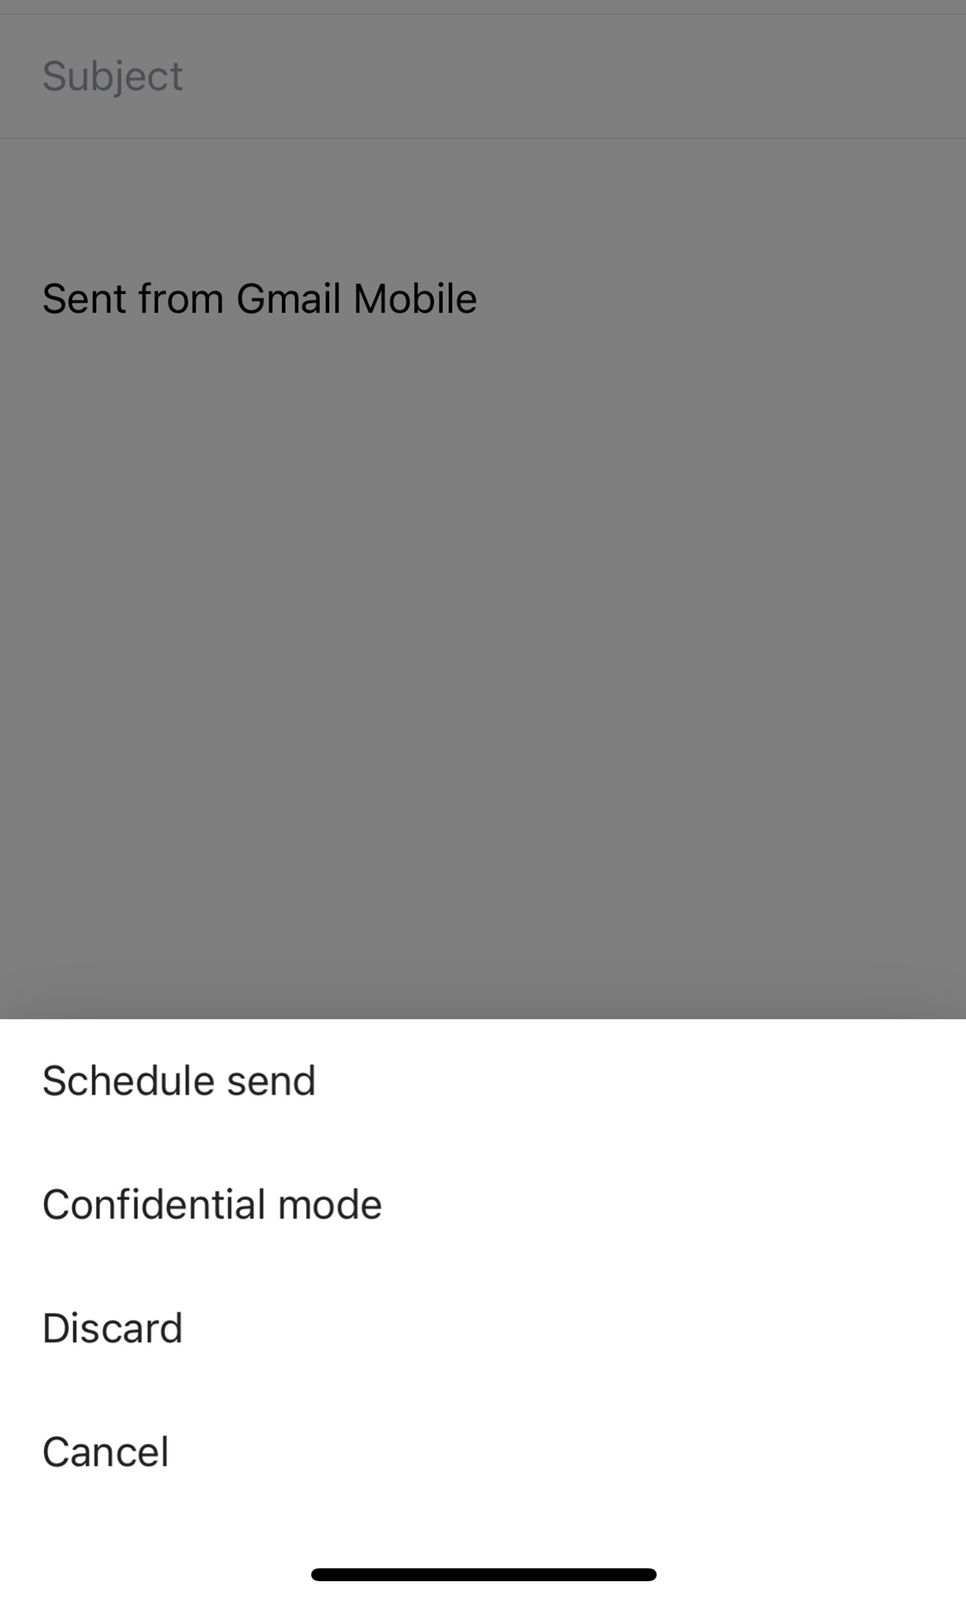
Step 4. Tap on “More” (three dots).
Step 5. Select “Schedule send”.
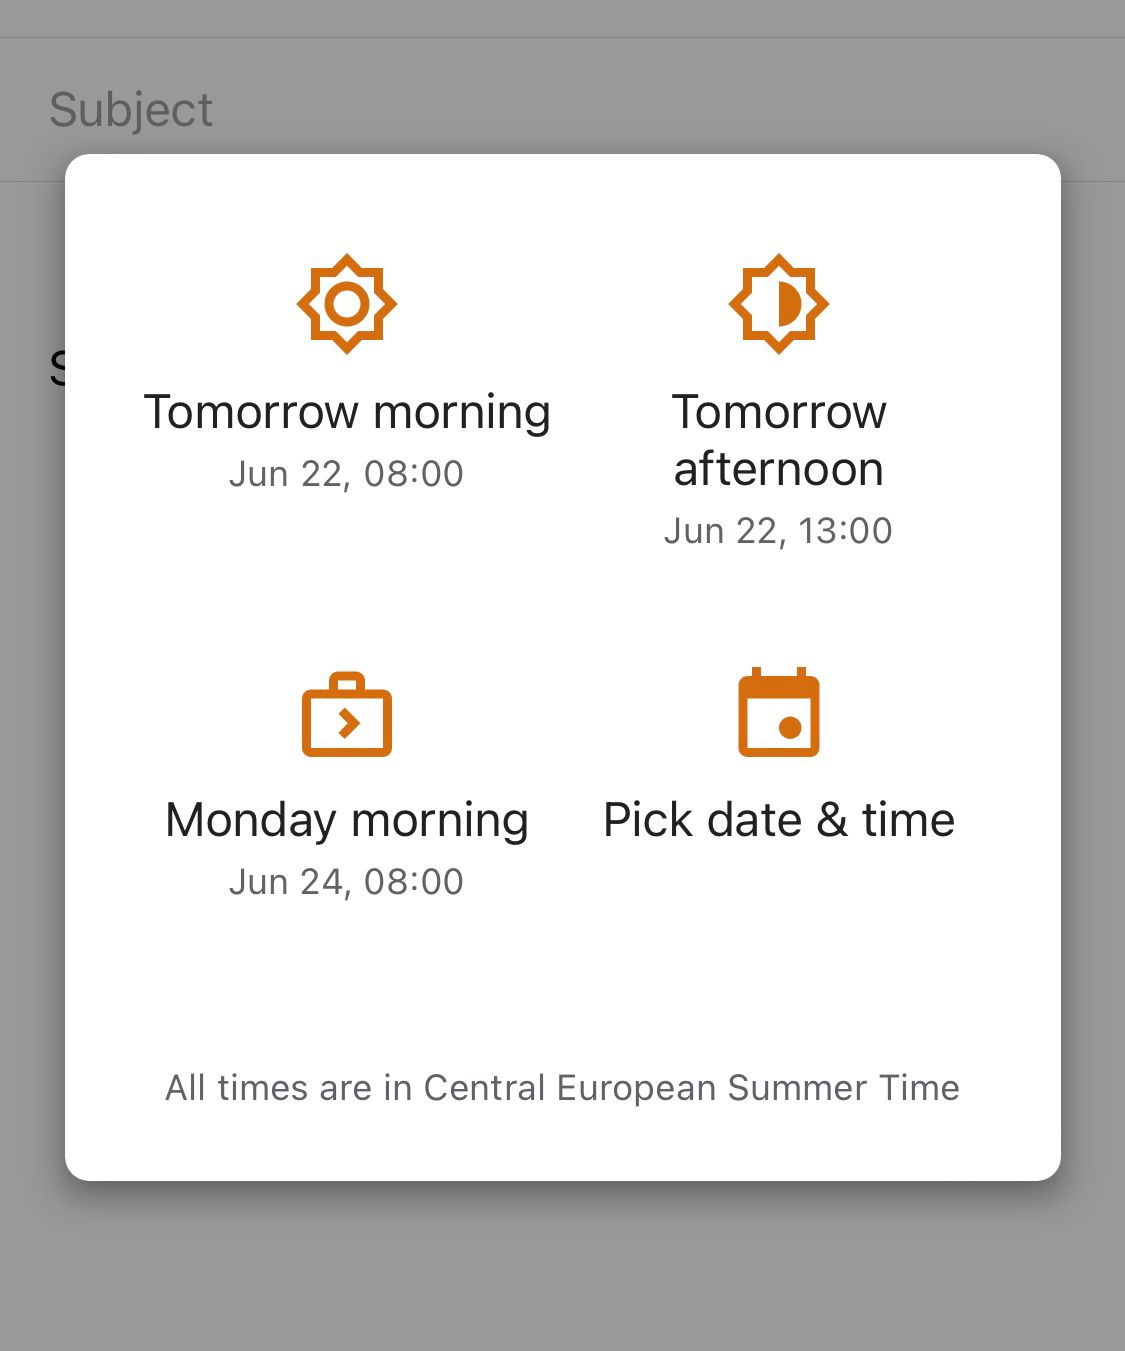
Step 6. Choose preset times or tap on “Pick date & time” for a custom time.
Step 7. Enter the date and time, then click “Schedule send.” Now your email will be automatically sent at the time you specified, let's say tomorrow afternoon or Monday morning.
On iPhone
Now for iPhone users, scheduling an email in Gmail on your iPhone or iPad is very easy, similar to the Android and desktop steps. Here’s how:
1. Search for your Gmail app on your iOS device.
2. Tap on “Compose”.
3. Write your message, add a subject line, and enter the recipient’s email address.
4. Tap on “More” (three horizontal dots).
5. Click “Schedule send” from the dropdown menu.

6. Choose one of Gmail’s default options or select a custom date and time.
7. Select the "Send" button.

Your email is scheduled to send at the selected time, ensuring it reaches the recipient when it's most convenient, increasing the chances of a response.
How to Edit Scheduled Emails in Gmail
Do you need to change an email you scheduled before? Or maybe add another recipient? We will show you how you can edit a scheduled email in Gmail:
1. Sign in to your Gmail account.
2. Go to the “Scheduled” folder: In the left-hand menu, find and click on “Scheduled.” This folder contains all your scheduled emails.

3. Select the email you want to edit: Click on the email that you want to change. This will open the email.
4. Cancel the scheduled send: Once the email is open, click on “Cancel send.” This step will stop the email from being sent at the scheduled time.
5. Edit your email: Now you can make changes to the email. You can edit the message, add or remove recipients, change the subject line, or update your email signature.
6. Reschedule the email: After making your changes, click on the down arrow next to the “Send” button. Select “Schedule send”.
7. Pick a new time: You can choose the same time as before by selecting “Last scheduled time” or pick a new date that works better for you.
Your changes are now saved, and Gmail will send the edited email at the new scheduled time.
How to Cancel Scheduled Emails in Gmail
Did you make a mistake or change your mind about an email you scheduled? Here’s how to cancel it:
1. Go to Gmail: Open your Gmail account on your computer or mobile device.
2. Open the “Scheduled” tab: In the left-hand menu, find and click on “Scheduled.” This is where all your scheduled emails are stored.
3. Select the scheduled email: Click on the email you want to cancel. This will open the email.
4. Cancel the send: Click on “Cancel send”. This will stop the email from being sent at the scheduled time.
That's it! You’ve successfully canceled your scheduled email. You can reschedule it later if you need to or delete the email by clicking on “Discard draft” if you no longer want to send it.
Schedule Emails at the Best Times With MailTracker
With MailTracker, you can increase your email open rates by over 20%, regardless of your industry.
MailTracker provides essential insights into recipient behavior and engagement, helping you understand your audience better and send emails at the best times.
With MailTracker, you can monitor open rates to measure interest, refine your content strategies, and tailor your future communications.
Add MailTracker to your Chrome for free and experience the tool yourself.


