

Email forwarding is an essential feature that can greatly enhance your email management experience.
Whether you need to share important information with colleagues, transition to a new email address, or simply streamline your inbox, knowing how to forward emails in Gmail can be incredibly useful.
This article will walk you through the step-by-step process of forwarding individual emails, setting up automatic email forwarding, creating forwarding filters, and disabling forwarding when it’s no longer needed.
By the end, you'll have a comprehensive understanding of how to efficiently manage your Gmail forwarding settings to suit your needs.
How to Forward an Email in Gmail
Receiving a new message and need to share it with someone else? You can easily forward emails from your Gmail account to any other email address, regardless of the email provider. Follow these detailed steps to forward an email in Gmail:
- First, sign in to your Gmail account.
- If you can’t find the email you’re looking for, use the search bar at the top of the page. You can search by the sender’s username or use keywords from the email, or you can filter by date.
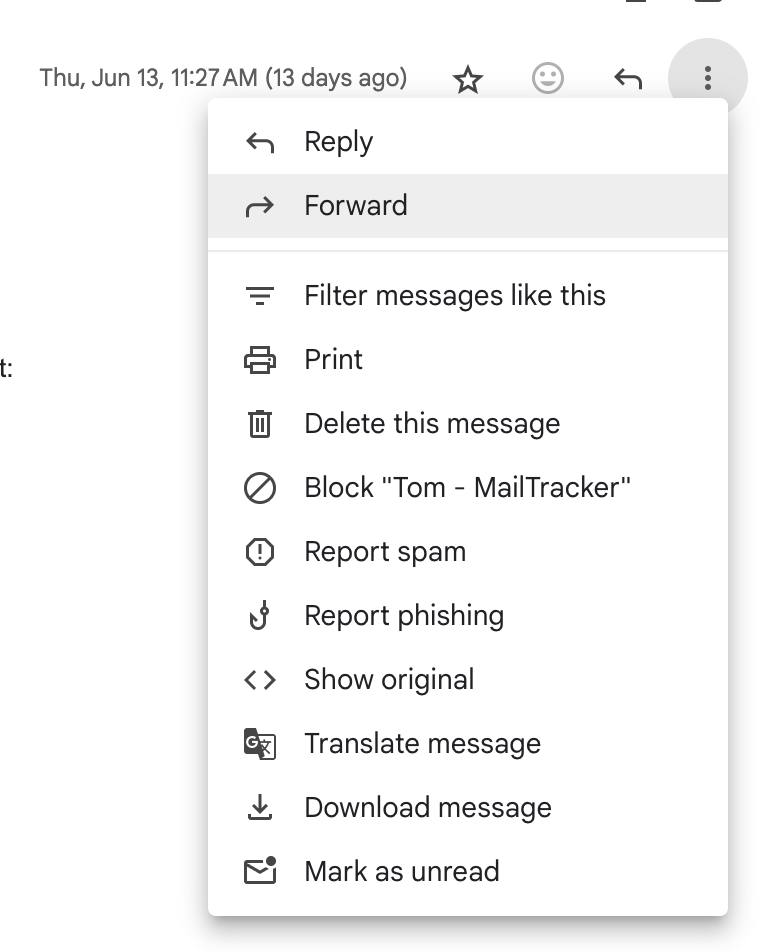
- Once you have opened the email, look for the three vertical dots icon as illustrated in the image below, in the top right corner of the Gmail window. Click on this icon to open a menu, then select "Forward."
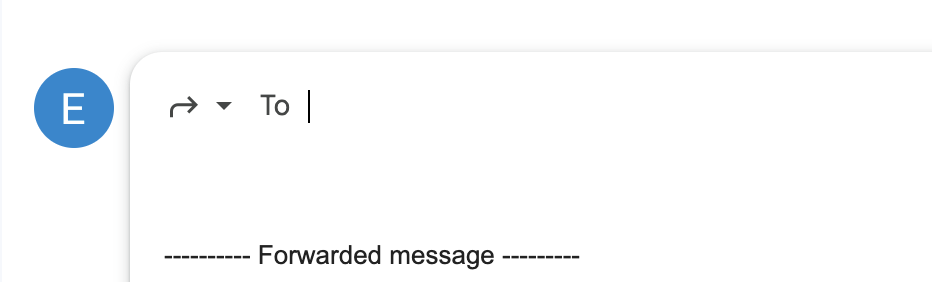
- In the forwarding window that appears, enter the email you want to send the message. Finally, click the “Send” button.
How to Forward All Your Gmail Messages Automatically
You can easily set up Gmail to automatically forward all your messages to another email address. Follow these steps to set it up:
- Sign in to your account on Gmail. Open Gmail on your desktop or your phone. Next, fill in your credentials, and click “Sign in.” If you are already signed in, then skip this step.
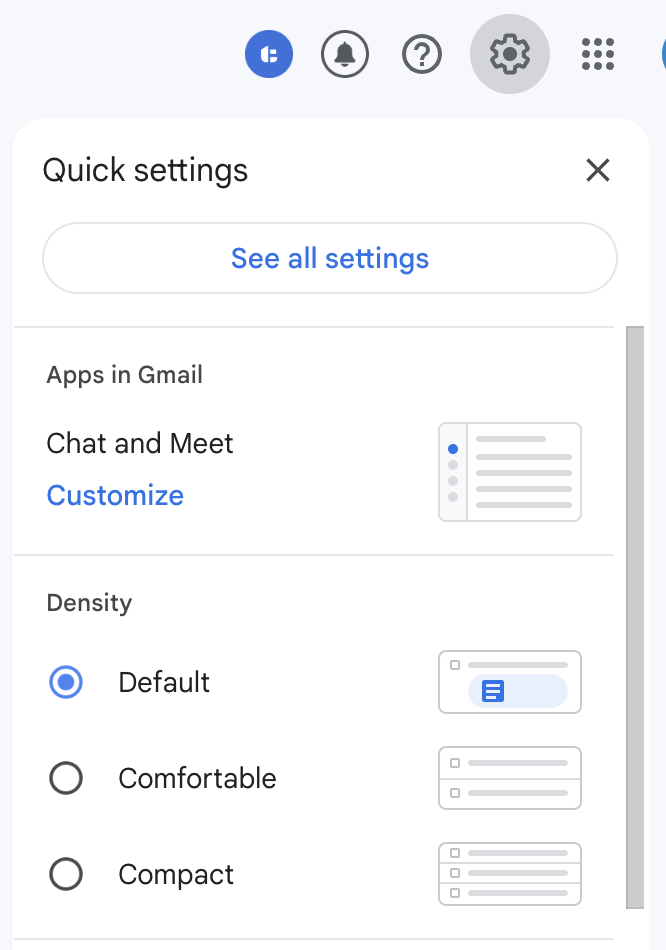
- Open the Gmail “Settings.” As seen in the image below, click on the gear icon or so-called Settings. Next, select “See all settings.”
- Navigate to the “Forwarding and POP/IMAP”. Now the next step is to click on “Add a forwarding address.”

- Enter a forwarding email address. Type the email address to which you want to forward your incoming messages. Click on “Next” to proceed.
- Verify the forwarding address. Now, you will recieve a confirmation code from Gmail to the forwarding email address. Sign in to the other email account and open the verification email from Google. Next, click on the verification link and tap on “Confirm.”
- Finalize the forwarding settings in Gmail. Return to your Gmail account and go to “Settings” > “See all settings” > “Forwarding and POP/IMAP.” In the “Forwarding” section, select “Forward a copy of incoming mail” and choose the email address you verified.
Note: Gmail only allows forwarding to one email address at a time.
- Choose how Gmail handles forwarded emails. Below we will list what you can choose to do:
- Keep a copy of the email in the original inbox.
- Archive Gmail’s copy.
- Mark Gmail’s copy as read.
- Delete Gmail’s copy.
Tip: It is recommended to select “Keep Gmail’s copy in the Inbox” to ensure you have access to all emails.
- Save your changes. You will find it when you scroll to the bottom of the page.
Now, all the emails sent to your Gmail account will be automatically forwarded to that specific email address. This is useful for transitioning to a new email address or monitoring your Gmail messages while you're out of the office.
Keep in mind that Gmail will forward all emails, which can be overwhelming. To manage your inbox better, consider setting up an auto-forward filter to forward only messages that match specific criteria.
How to Create a Forward Filter in Gmail
Now, let's move on to the next step: creating a forward filter. This feature allows you to transfer specific Gmail messages to another email address. Follow these six simple steps to set it up:
Step 1: Sign in to your Gmail account. Open Gmail on your desktop or phone. Enter your credentials, like your email and password, then click “Sign in.”
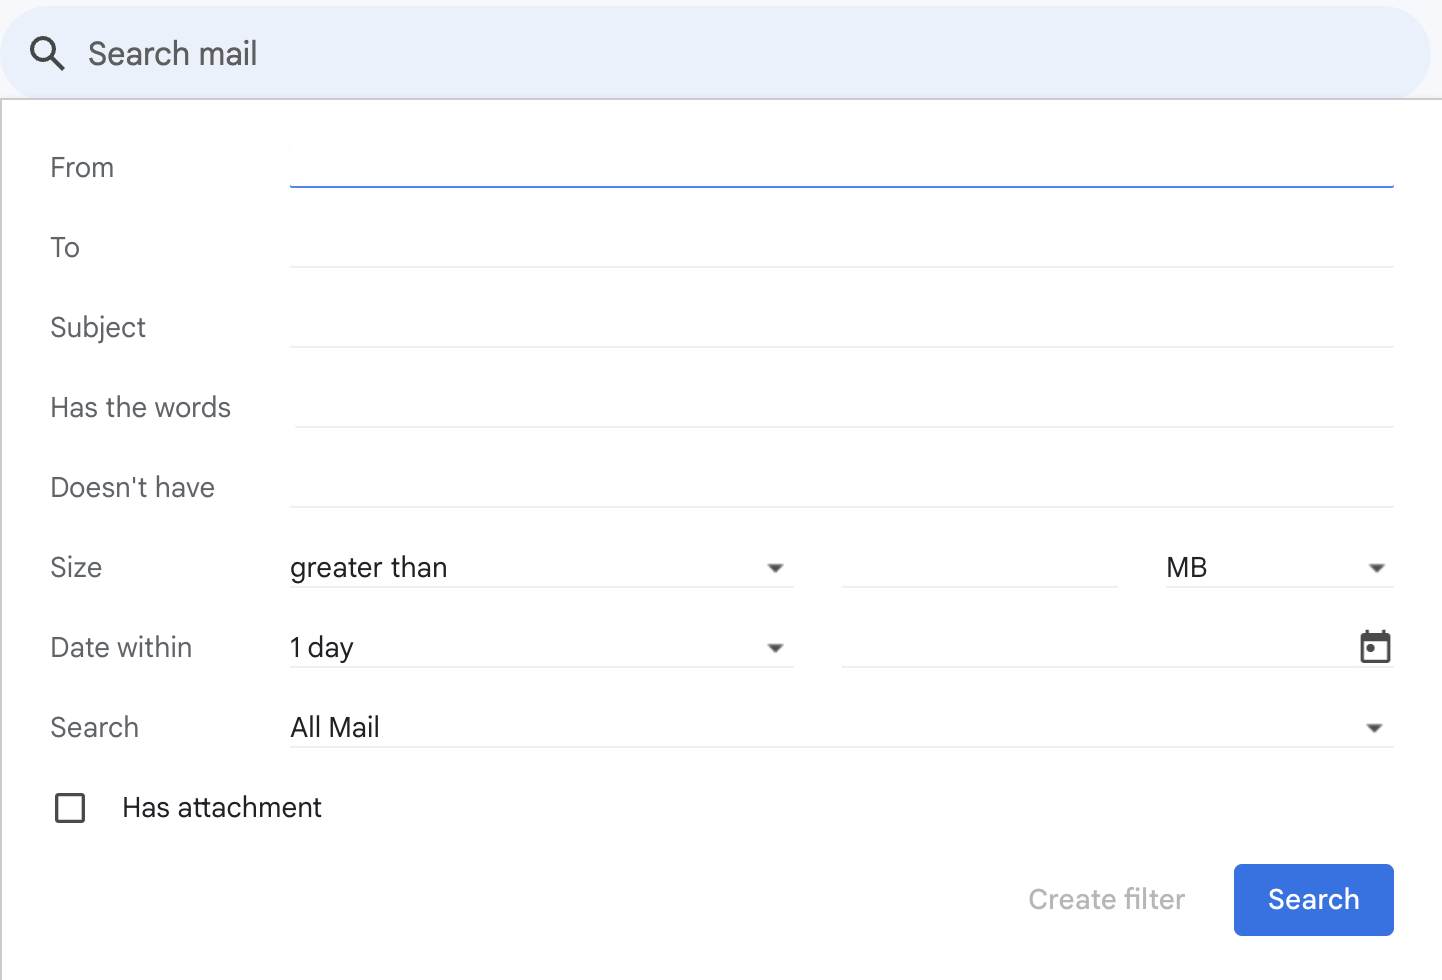
Step 2: Click on “Show search options”. Locate the search bar at the top of the Gmail interface. Click on the small icon that looks like three lines or a funnel right next to the search bar. This will open the “Show search options” menu.

Step 3: Create your filter. In the “Show search options” menu, you can filter emails in Gmail by various criteria, such as:
- Recipients
- Subject
- Size
- Keywords
- Whether the email has attachments
Step 4: Fill in the fields based on how you want to filter your emails. Once you’ve set your criteria, click on “Create filter.”
Step 5: Activate the “Forward it to” option. After clicking “Create filter,” a new set of options will appear. Check the box next to “Forward it to.” From the dropdown menu, select the email address to which you want to forward your filtered messages. If the desired email address is not listed, click on “Add forwarding address” and follow the steps to add and verify a new forwarding address, as mentioned earlier.
Step 6: Finalize and save the filter. After selecting or adding the forwarding address, click on “Create filter” to activate it. Gmail will now automatically forward any incoming messages that match your filter criteria to the specified email address.
Managing Your Filters:
- You can create multiple filters to forward different types of messages to various Gmail accounts.
- If you need to edit or delete a filter, go to “Settings” > “See all settings” > “Filters and Blocked Addresses.”
- Then, you can modify or remove any existing filters.
By setting up filters, you can ensure that only specific types of emails are forwarded to another email address, keeping your inbox organized and managing your email flow efficiently.
How to Disable Automatic Email Forwarding in Gmail
If you no longer want to forward all your Gmail messages to another email account, you can easily disable the auto-forwarding feature. Follow these steps to stop Gmail from forwarding your emails:
- Sign in to your Gmail account.
- Go to Settings. Next, from the dropdown menu, select “See all settings.”
- Click on “Forwarding and POP/IMAP” to access the forwarding settings.
- Disable forwarding. In the “Forwarding” section, find the option that says “Disable forwarding.” Click on it to stop Gmail from automatically forwarding your emails to another account.
And that's it! Gmail will no longer forward your incoming emails to another email address, giving you full control over your inbox again. This can be useful if you've switched to a new email provider or no longer need your messages forwarded.
Use MailTracker for Free to Track Your Emails
MailTracker lets you easily track Gmail emails. All new emails you send are tracked automatically.
Check if your emails were opened by looking for the double-check mark icon in the emails you sent. Also, set up alerts and notifications by clicking on the MailTracker icon in your Gmail account.
Try MailTracker now and never miss an important email update!
