

It's easy for important emails to get lost when your inbox is full.
Fortunately, Gmail offers a solution to help you manage your emails more effectively. By creating rules in Gmail, you can automate various tasks that keep your inbox organized.
These rules can help you sort emails into specific folders, flag significant messages, and set up automatic replies. This way, your inbox transforms into a smart assistant, making email management a breeze.
Let's dive into the steps to set up these helpful Gmail rules!
What Are Gmail Rules?
Gmail rules help you automate and simplify email management, making it easier to stay organized. In short, it's like having a personal assistant for your inbox who sorts and filters your emails for you.
You set up criteria based on sender, subject, or keywords and then decide what actions Gmail should take. For example, you can have all emails from your boss automatically labeled and moved to a specific folder.
Why Every Business Need Gmail Rules?
Setting Gmail rules comes in handy as they help you manage your emails efficiently, reducing the risk of missing important messages.
This situation is even more complicated for businesses that have to manage client and supplier emails.
Setting Gmail rules for your business lets you filter and sort emails into specific folders, allowing you to prioritize and focus on what matters most.
It ensures that important emails are highlighted and attended to promptly, making your email management more effective and less prone to errors.
Setting Up Gmail Rules: A Step-by-Step Guide
Gmail rules can help you manage your emails more efficiently. Here’s a simple guide to creating rules in Gmail to keep your inbox organized.
- Log in to Gmail. Start by opening your web browser and accessing your Gmail account.
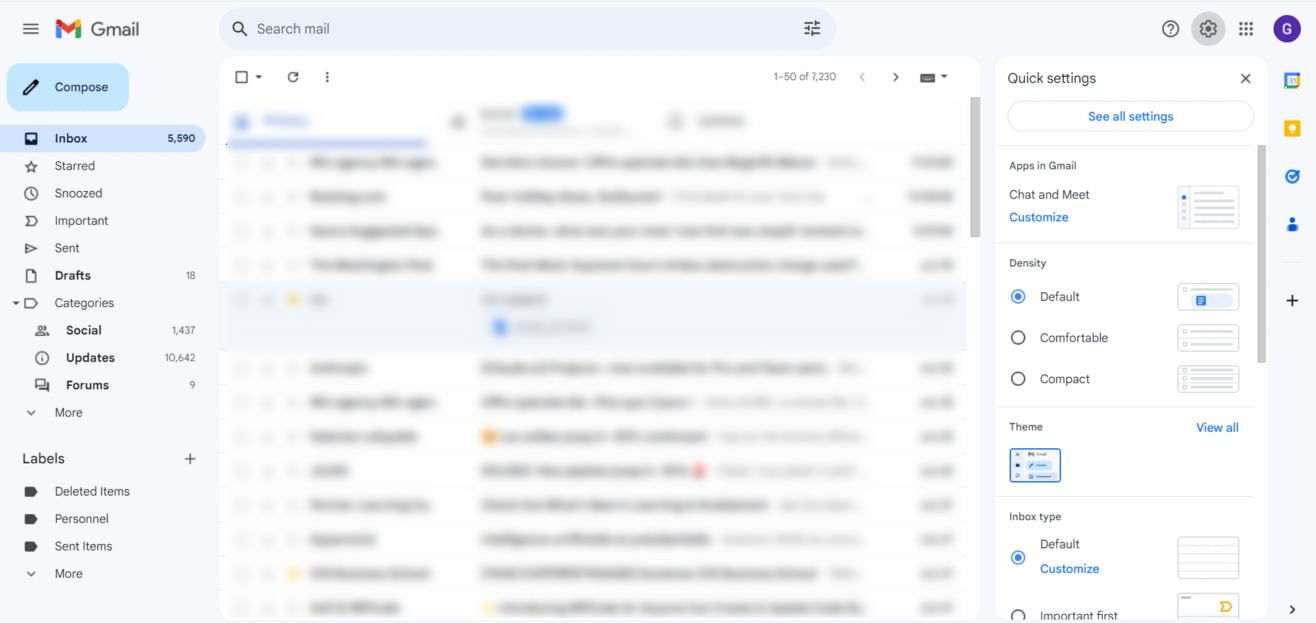
- Access the settings menu. Once you're logged in, click on the gear icon located in the upper right corner. From the dropdown, choose "See all settings" to enter the main settings menu.
- Select “Filters and Blocked Addresses”. Within the settings, select the “Filters and Blocked Addresses” tab. This is where you can set up and manage your email rules.
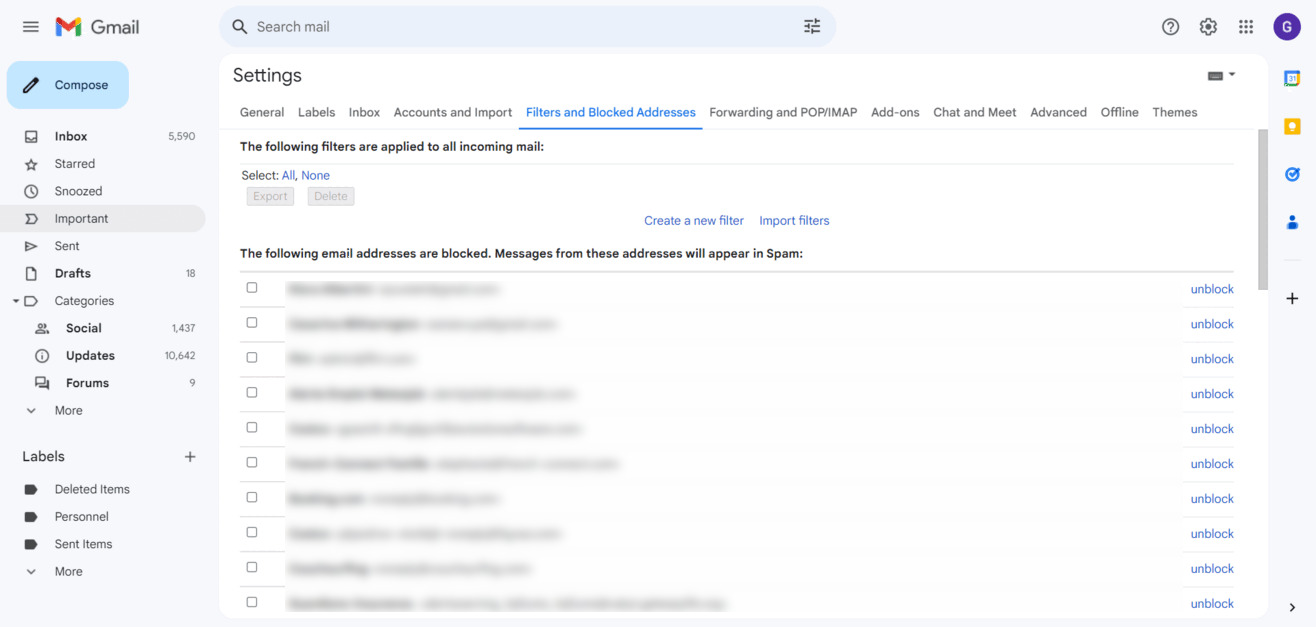
- Create a new filter. Click on the “Create a new filter” button to start the process. A new window will pop up, allowing you to specify the conditions for your filter. This enables you to determine how your incoming emails will be processed and organized.
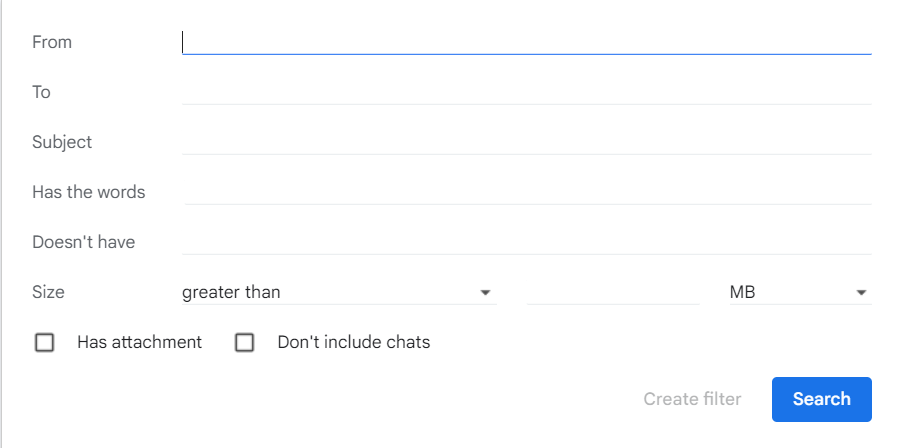
- Set your filter criteria. Start by entering the criteria for your filter. In the "From" field, type the sender’s email address you want to filter. You can also filter by other details, such as the recipient, subject, or specific keywords. After entering your criteria, click the "Create filter" button.
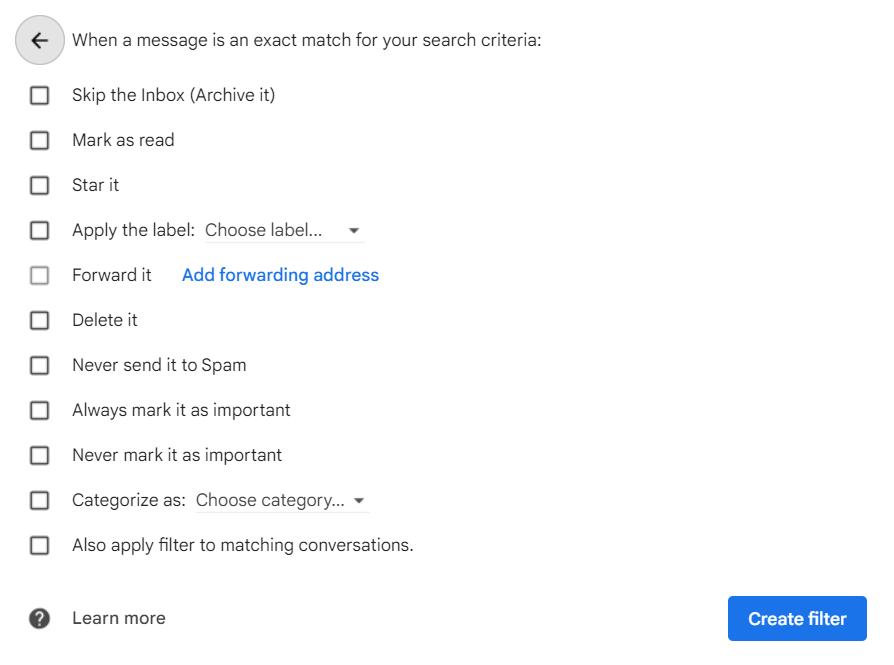
- Choose your filter actions. Next, decide what happens when an email matches your criteria. You can apply a label to the email, mark it as read or unread, archive it, delete it, and more. You can choose multiple actions by selecting the checkboxes. When you're done, click the "Create filter" button at the bottom.
- Edit or delete your filter. If you need to change or remove a filter, select the “Filters and Blocked Addresses” option in the Settings menu. Find the filter you want to edit or delete, and make the necessary changes or remove it from there.
Setting Up Gmail Filters from Existing Emails
Creating email rules in Gmail directly from an existing email is a convenient way to manage your inbox. Here’s how to do it step-by-step:
- Open the email. Log in to your Gmail account. Find the email for which you want to create a rule and open it. This email will be used as the basis for your new rule.
- Click on the “More” button. In the top menu bar, click on the “More” button (three vertical dots). This will open a dropdown menu.

- Select “Filter messages like these.” From the dropdown menu, click on “Filter messages like these.” A new window with filtering options will appear.
7 Advantages of Using Gmail Rules
Implementing rules in Gmail can turn your inbox into a smart, automated assistant. Here are some key advantages of using it:
1 . Archive or delete unwanted emails. You can keep your inbox clutter-free by creating rules to automatically archive or delete spam or unwanted emails. This can be based on the sender or specific keywords in the subject line, ensuring that irrelevant messages are dealt with immediately without manual intervention.
2. Mark emails as Read or Unread. You can also use rules to mark certain emails as read or unread automatically. For example, you can set a rule to mark all emails from your boss as unread until you have read them, ensuring these important messages remain highlighted until you address them.
3. Auto-reply to emails. Another benefit of setting up rules is to reply to emails that meet specific criteria automatically. This acts as a personalized auto-responder, providing scheduled, timely responses to certain senders without manual effort. For example, you can create a rule to send an acknowledgment email to clients, letting them know you received their message and will respond soon.
4. Organize your inbox. Gmail rules let you automatically categorize incoming emails into specific folders or labels. This helps you track emails by topics, clients, projects, or priorities, making it easier to manage your messages. For example, emails related to a particular project can be directed to a specific folder, keeping your inbox organized and making it easier to find relevant emails quickly.
5. Flag important emails. Ensure you never miss critical emails by setting rules to flag messages from specific people or those containing certain keywords automatically. This way, important emails stand out and catch your attention, such as marking all emails from key clients with a star or another special label.
6. Prioritize emails. You can use rules to prioritize emails based on criteria such as sender, subject, or keywords. This helps you focus on the most important messages first, improving your productivity. For example, emails from your team about ongoing projects can be marked as high priority so you can address them promptly.
7. Sort emails by date. Last, you can automatically sort emails by the date received, making it easier to find recent or older messages quickly. This can be especially useful for tracking ongoing projects or communications over time, such as sorting client communications to easily access the most recent updates.
Manage Your Emails and Stay Organized with MailTracker!
Now that you've learned how to create rules in Gmail to organize your inbox take your email management to the next level with MailTracker.
MailTracker helps you keep track of who opens your emails, ensuring your important messages are seen.
With MailTracker, all emails you send are tracked automatically. You can easily see if and when your emails are opened by looking for the double-check mark icon in your sent emails.
Set up alerts and notifications by clicking on the MailTracker icon in your Gmail account so you always know if your critical emails are read.
To stay even more organized and in control of your email communications, start now with MailTracker.
